


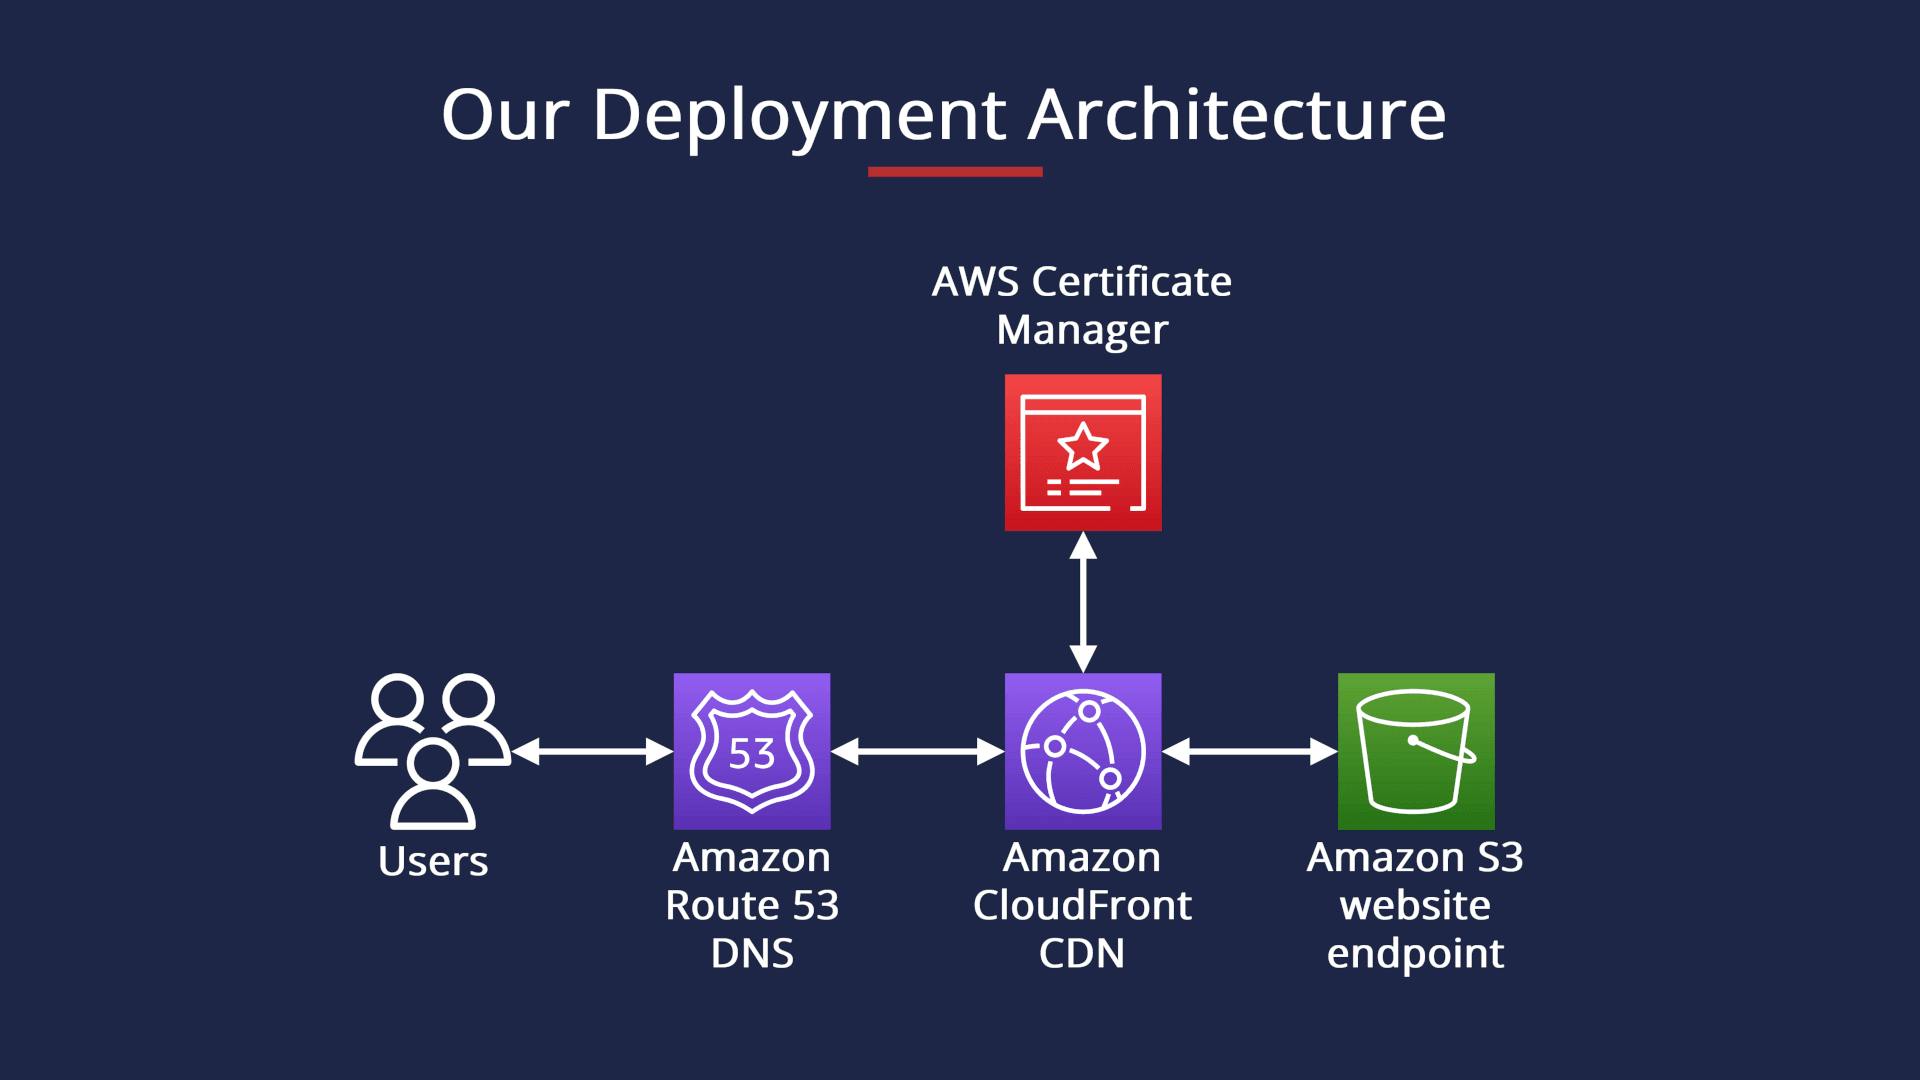
Ever since I started expanding my knowledge with AWS and the world of the Cloud, I wanted to start creating real projects to gain practical experience with some services. Additionally, I wanted to create my personal website, as it greatly benefits one's professional profile to be able to demonstrate their skills through practice. Having practical experience not only provides valuable experience but also allows others to see how you begin to master certain services. Follow me in this tutorial so that you can host your static website within AWS services! We will use the following architecture.
Architecture:
Let's start!
AWS S3 Website Endpoint
We will use the AWS S3 service to store the files that make up our website because S3 is an object storage service.
Step 1: From the AWS console, navigate to the S3 console. Click on "Create Bucket". Step 2: Begin configuring our bucket.

Bucket name: Your domain name. It is important to use the name of your site for best practices and performance.
AWS Region: The region where you are located and, if you have a certificate, the region it is in.
ACLs Disabled: Not necessary for this project.
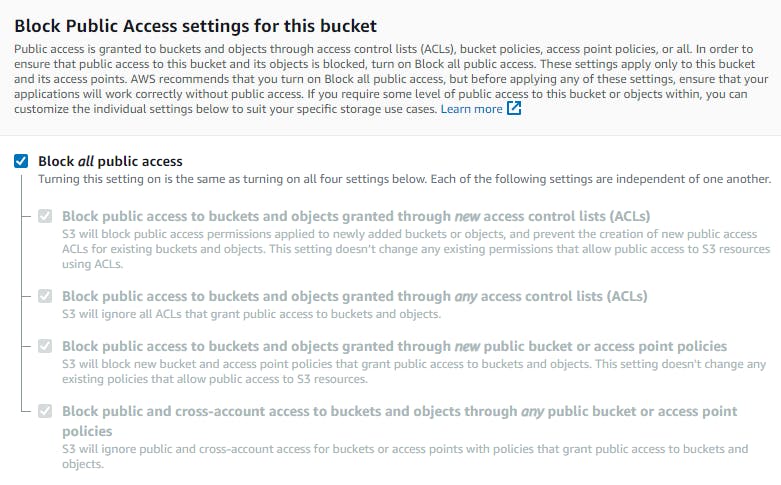
- Block all public access: Leave this as it is because we will use CloudFront to distribute content and it is not necessary for any service or somebody to access our bucket.
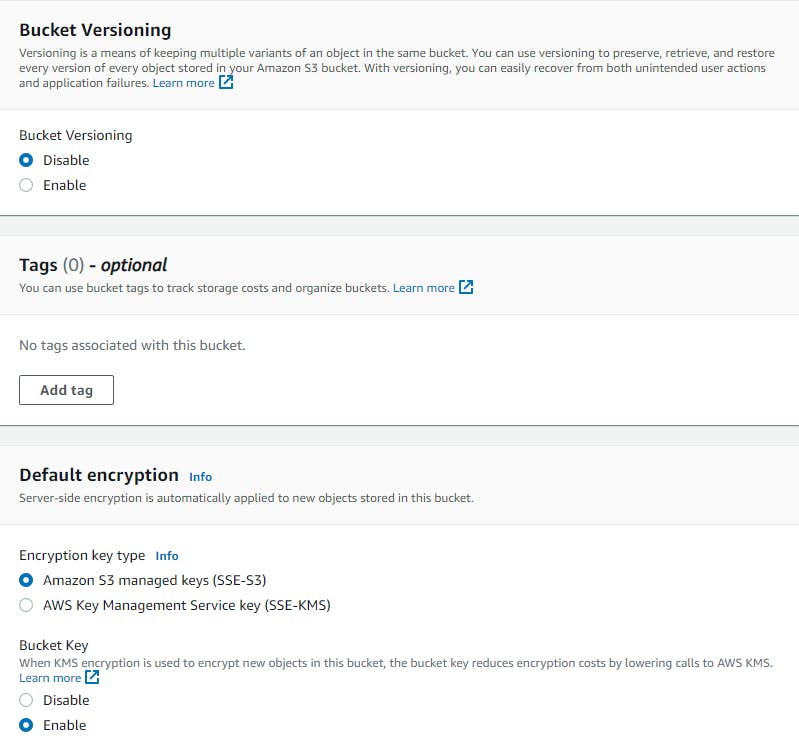
Bucket Versioning: Disable by default
Tags: None - Optional
Default Encryption: SSE-S3 by default
Step 3: Create Bucket!
Amazon CloudFront CDN:
When a user requests content from your website, CloudFront caches the content at edge locations around the world. This means that subsequent requests for the same content can be served from the edge location closest to the user, reducing latency and improving website performance. So, once we have our S3 loaded with our data, we can create the distribution that will make our content reach anywhere.
Step 1: From the AWS console, we will go to CloudFront, and once we enter, we will click on "Create Distribution."
Step 2: Start configuring our distribution.
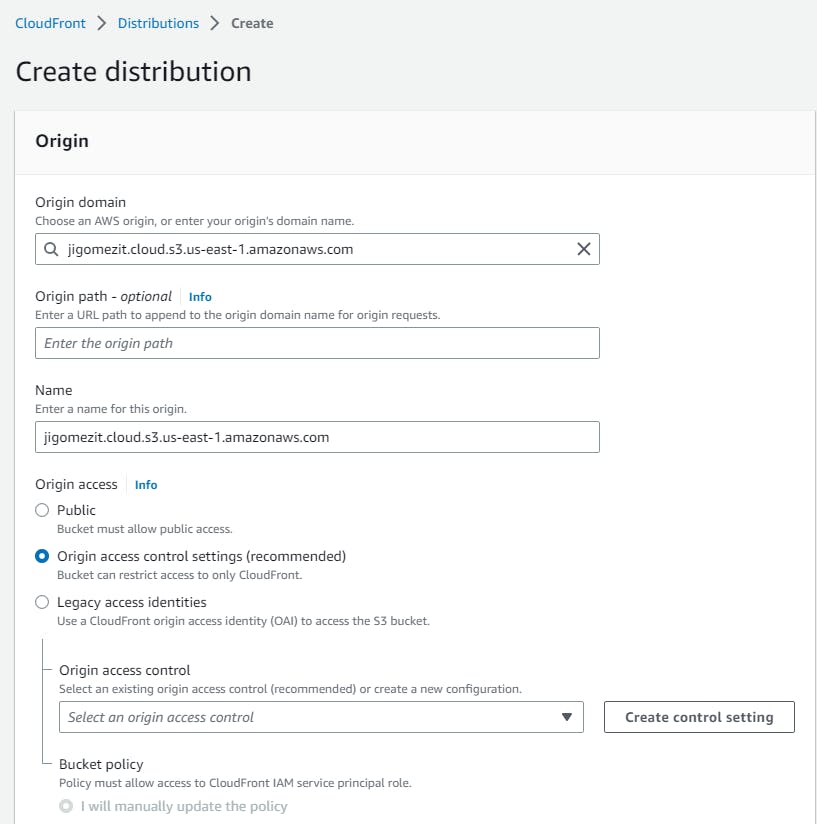
Origin domain: we search for our S3 by name in the list that appears when we click on the field. Here we are telling our CloudFront where to look for the information or content that will be provided once it is requested.
Name: it will be auto-populated once we have entered our S3.
Origin Access: we will click on "Origin access control settings." With this, CloudFront will create a permission policy that we will then need to copy and enter in our S3 so that our bucket can be accessed by the service. Finally, we will click on "Create control setting."

Create control setting: This pop-up will appear, and we just click on "Create," leaving everything at default. The policy for our bucket will be created once we finish configuring our distribution. Now, let's continue to Default Cache Behavior.
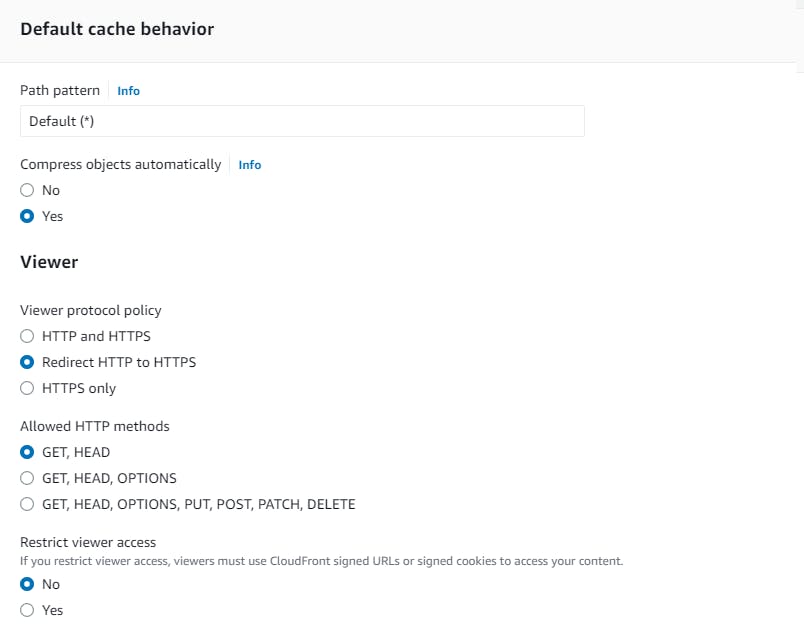
Viewer protocol policy: this is the only part we will modify here. We will click on "Redirect HTTP to HTTPS." It comes by default as HTTP and HTTPS, meaning that when calls are made to our domain from HTTP, it will automatically redirect to HTTPS, avoiding a DNS error. Finally, we will continue until we reach the final options under "Settings".

Alternate domain name (CNAME): here, we will enter the domain that will be pointing to our CloudFront distribution.
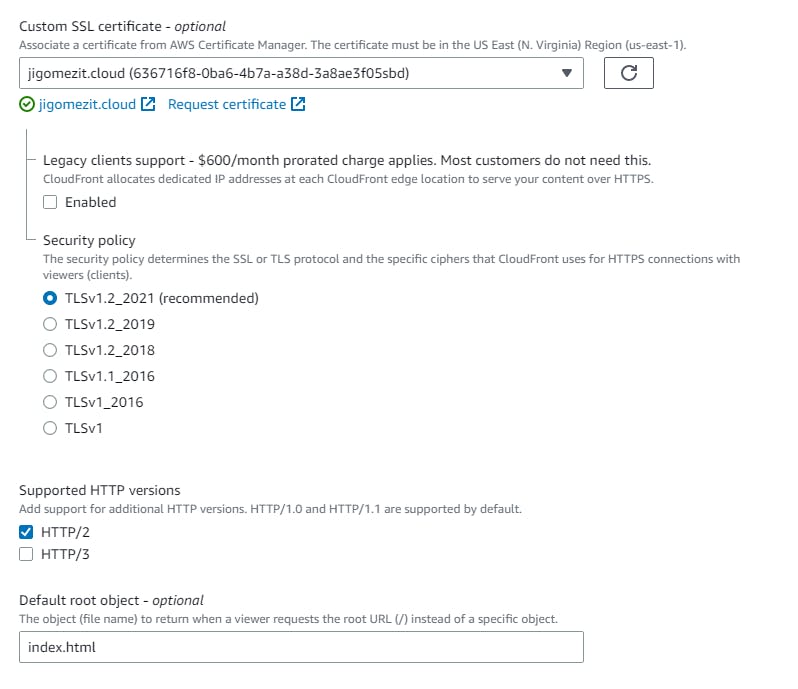
Default root object: we declare that our main file will be index.html when our distribution is called via jigomezit.cloud
Custom SSL certificate: this is an important part because we have to create our certificate first before adding it to our site. Click on "Request Certificate," and let's go!
AWS Certificate Manager
ACM offers free SSL/TLS certificates that are automatically renewed, simplifying the process of securing your website without requiring manual certificate management. By utilizing ACM to generate SSL/TLS certificates for your CloudFront distribution, you can ensure that your website adheres to industry standards and is secure. Pretty cool, right? Let's create our certificate.
Step 1: If you click "Request certificate," it will take you to the "Certificate Manager" console in a new tab. Once you have entered the required information, click "Request".
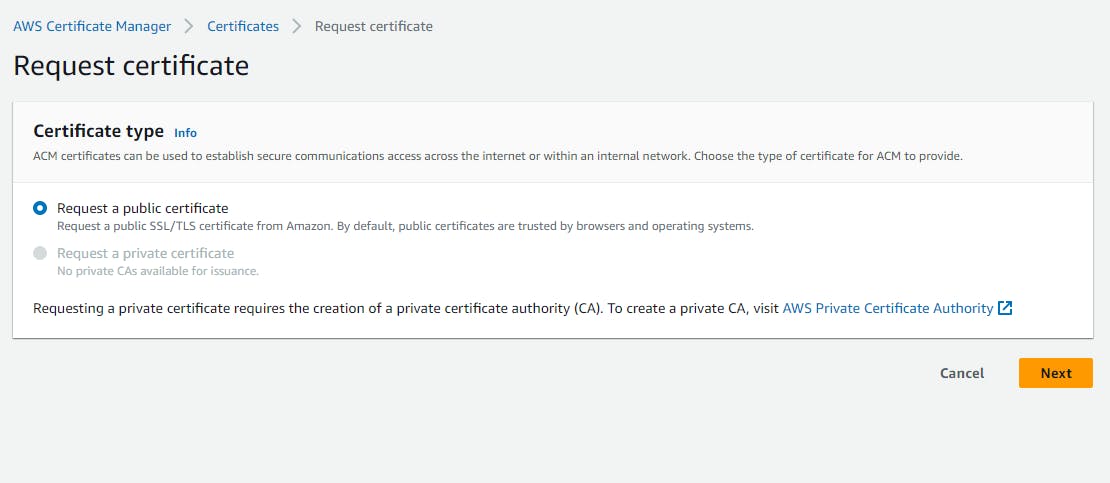
Step 2: Request a public certificate, and then click "Next".
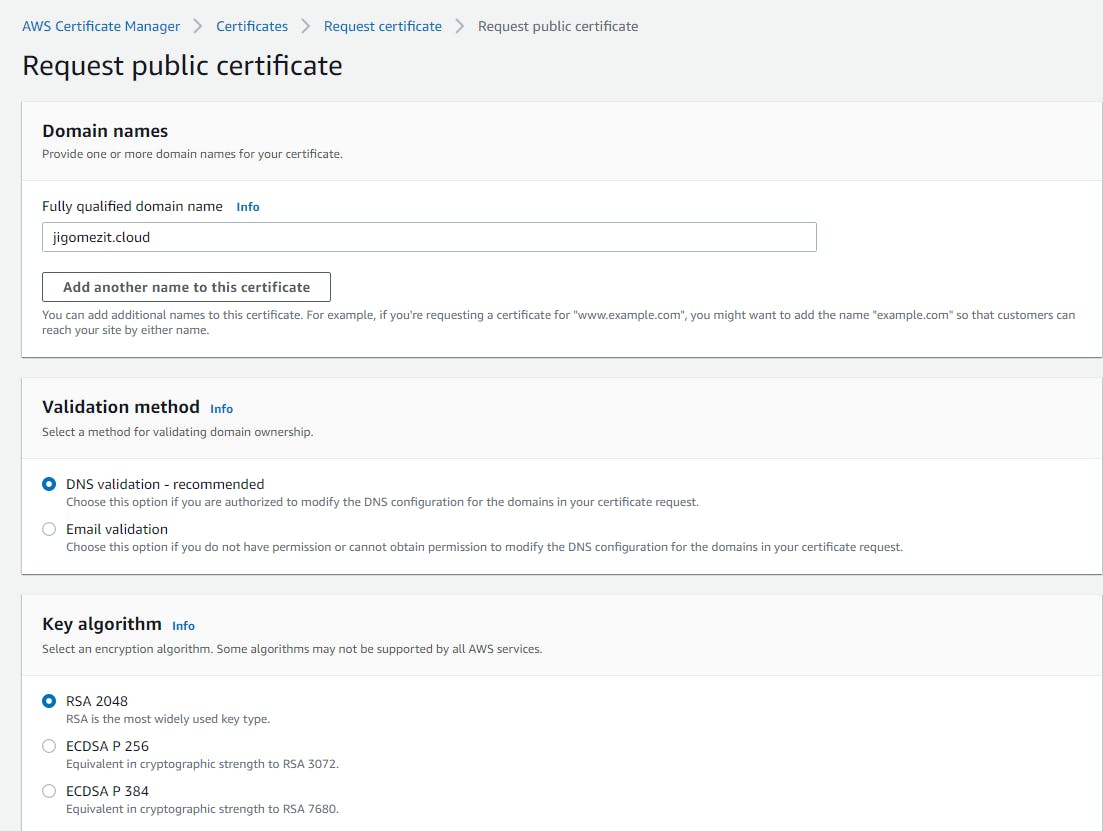
Fully qualified domain name: Enter the name of your domain.
Validation method: This will depend on your preference. In my case, I used "Email Validation" to verify the certificate.
Key algorithm: Leave the default option "RSA 2048," and then finalize the request.

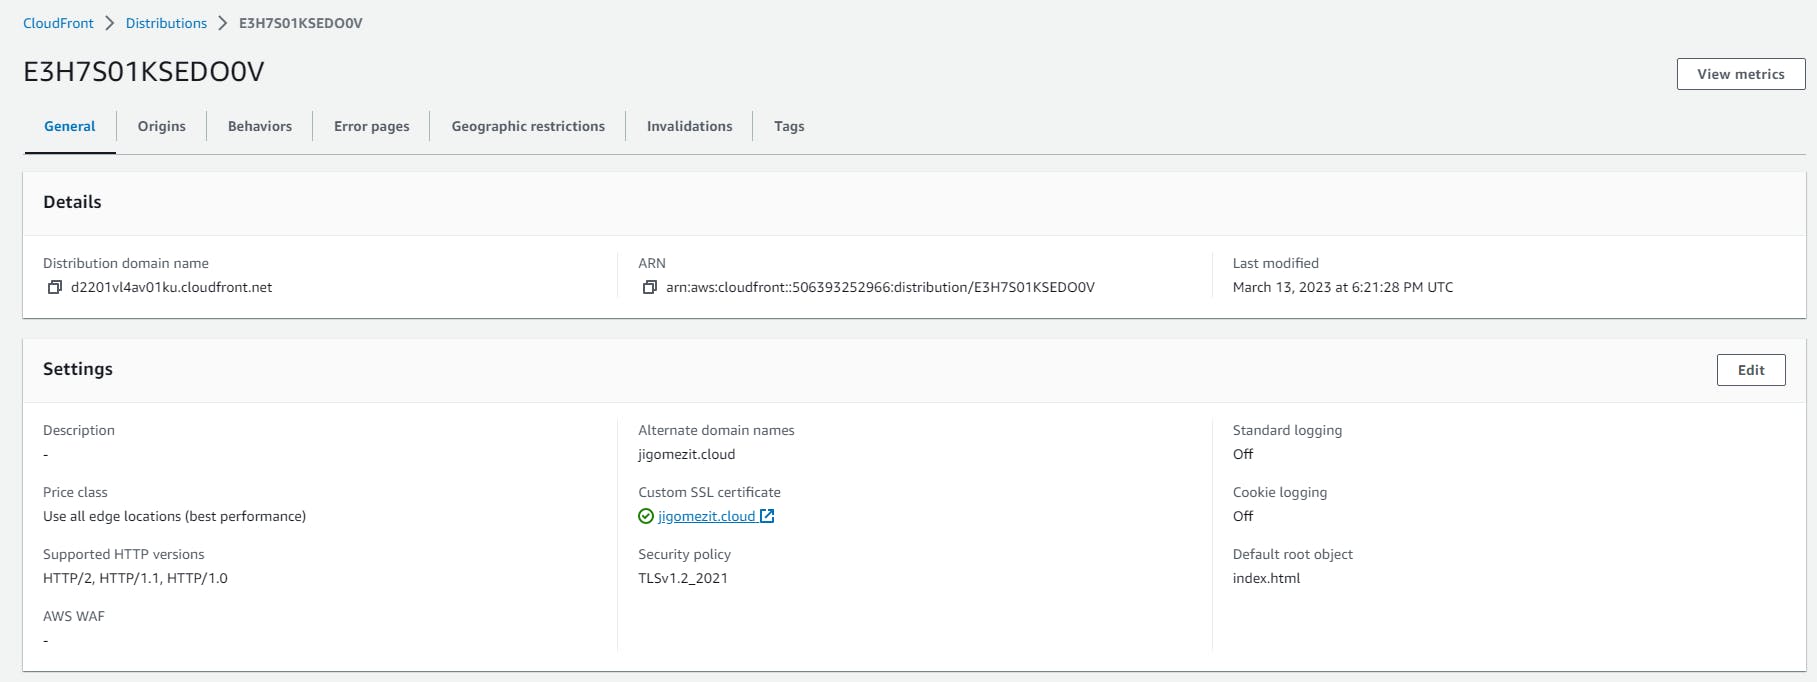
Finally, we have created our certificate to ensure that our website meets industry standards for security. Once you have completed the previous step, you can return to your tab where you were creating the CloudFront distribution and add your certificate. It should appear as follows, with the certificate and default root object added:
Once the distribution has been deployed, we will receive our "ENABLED"!

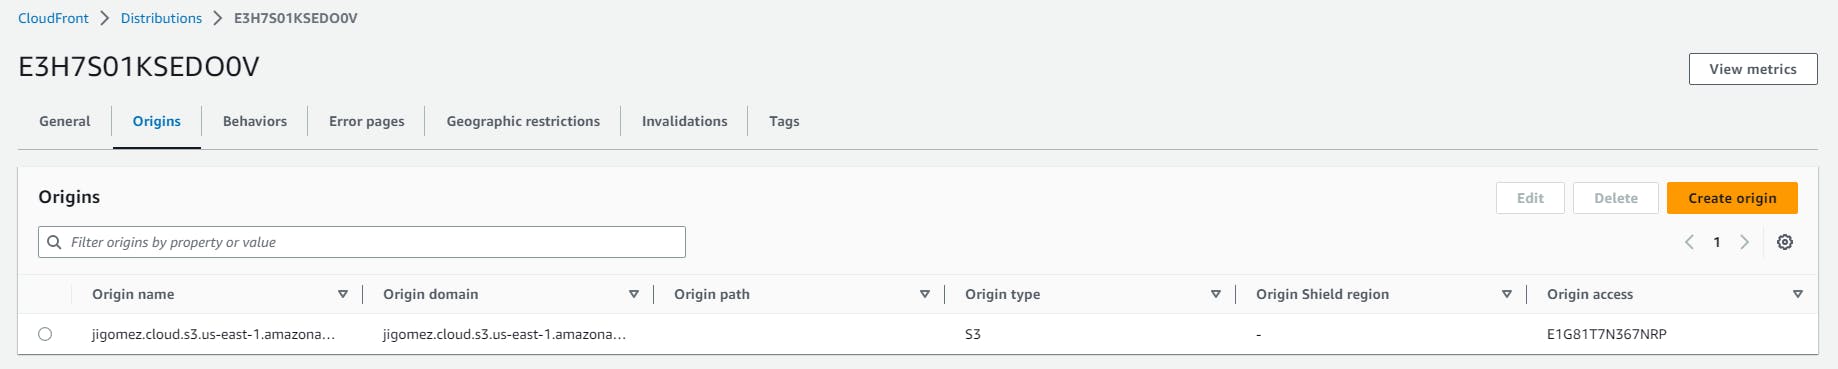
Now, we need to re-enter our distribution to copy the policy created to our S3, which will enable CloudFront to have read permissions.
We should see the following screen:
Navigate to "Origins," where we will find our source bucket. Select it and click "Edit".
Then, locate "Bucket Policy" copy our policy.
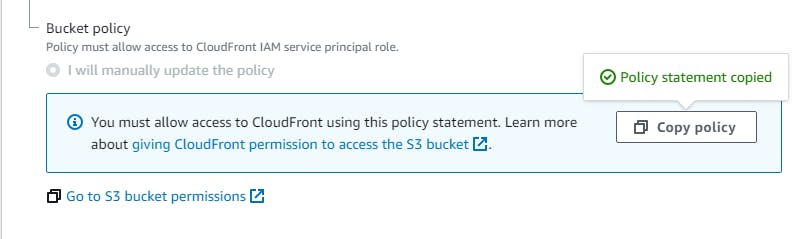
Use the shortcut "Go to S3 bucket permissions," or go to the S3 console, access our bucket, and find the "Permissions" tab.
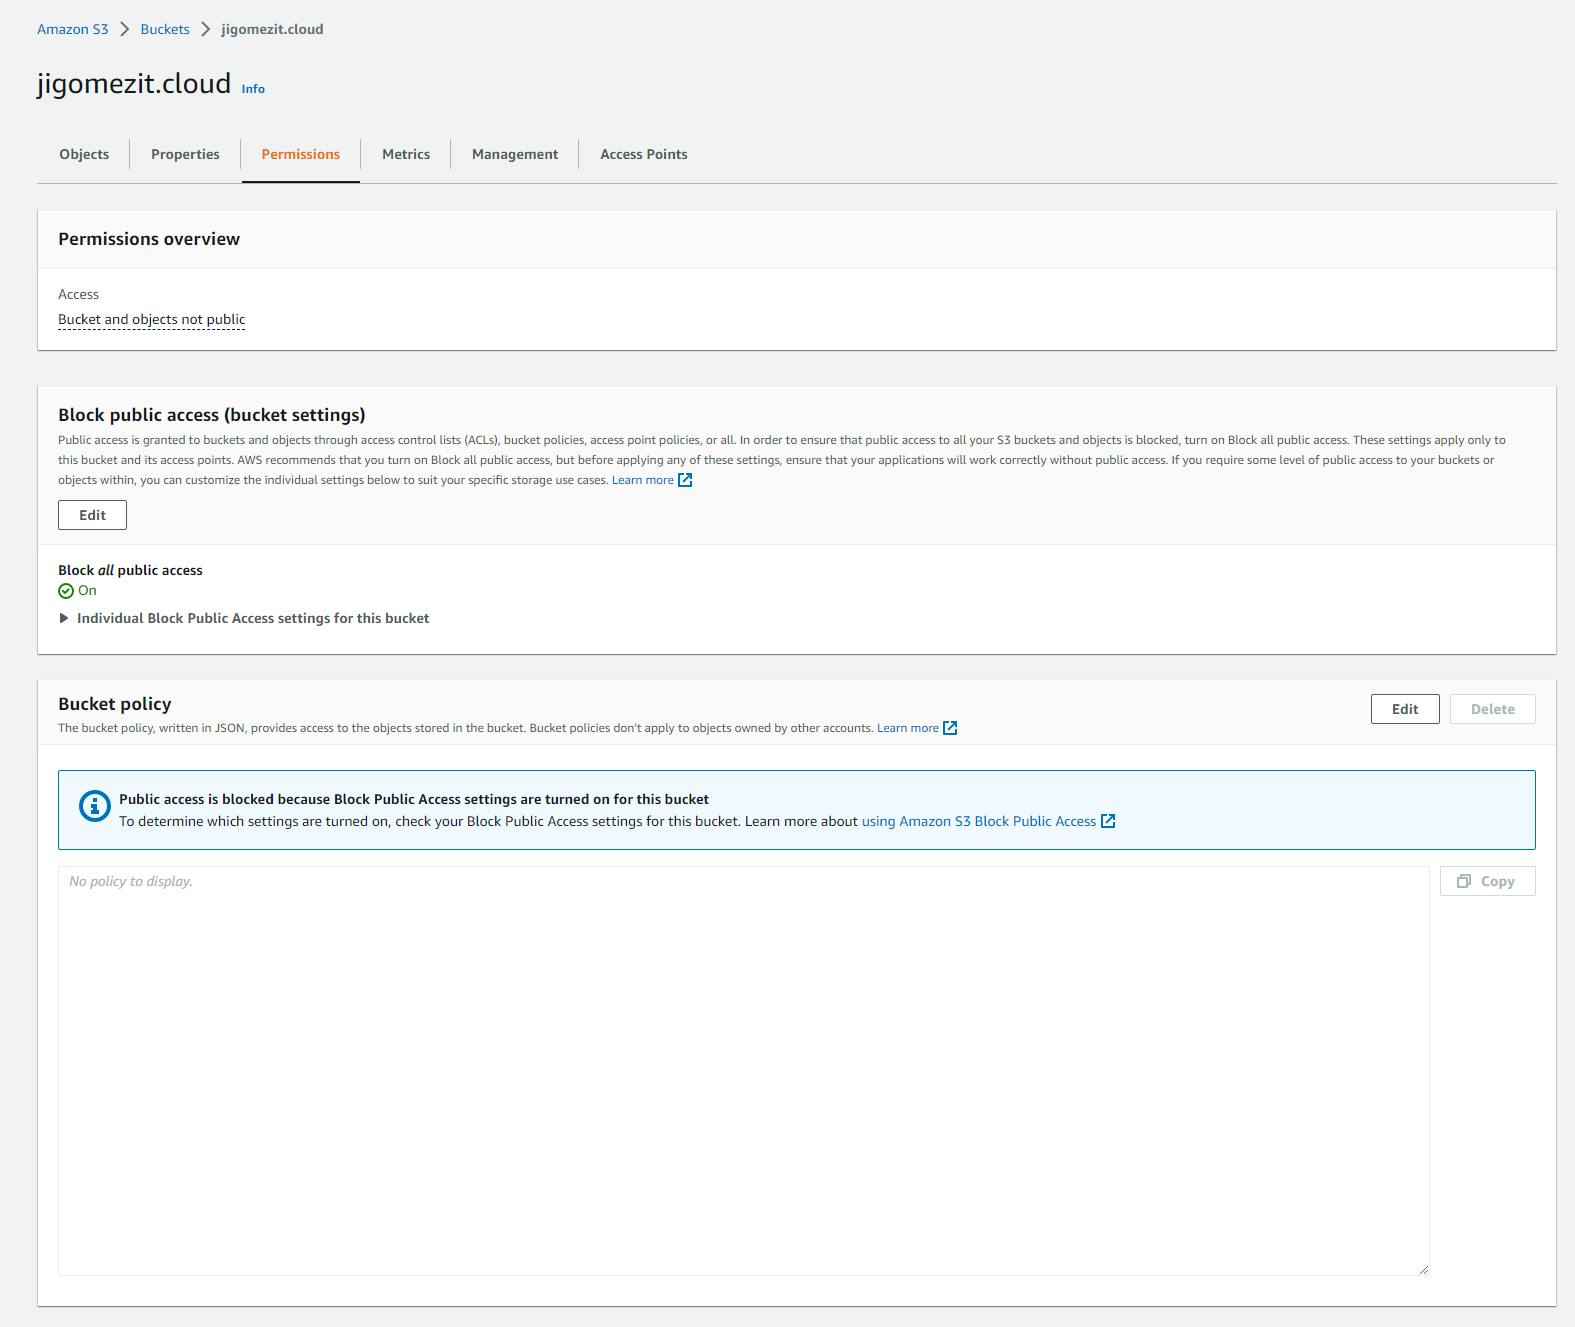
Edit, paste, and save the policy.
From now on, we should be able to access the URL provided by our distribution and verify that our site is online, but with a CloudFront address. What's next? Adding our domain! This means creating a route between our DNS, for example, jigomezit.cloud, that points to our distribution. Let's move on to the final step: Route53!
Route 53
Route 53 is the AWS service used to direct traffic from your domain name to your CloudFront distribution. This distribution serves as the front-end for your static website that is hosted on S3. By configuring Route 53 to point your domain name to your CloudFront distribution, you can ensure that users can access your website using your domain name, and the traffic is routed to the closest CloudFront edge location for improved performance.
To complete this step, you will need to have a domain name or purchase one from the AWS service for $14.99 per year. Once you have your domain name, navigate to the "Hosted Zone" in Route 53. You should see that you have 1 "Domain" listed.

Click on the domain name and then click on "Create Record". Choose "simple routing" in Route 53 as it is the most straightforward routing method to use for simple scenarios, such as routing traffic to a single resource, such as a CloudFront distribution.
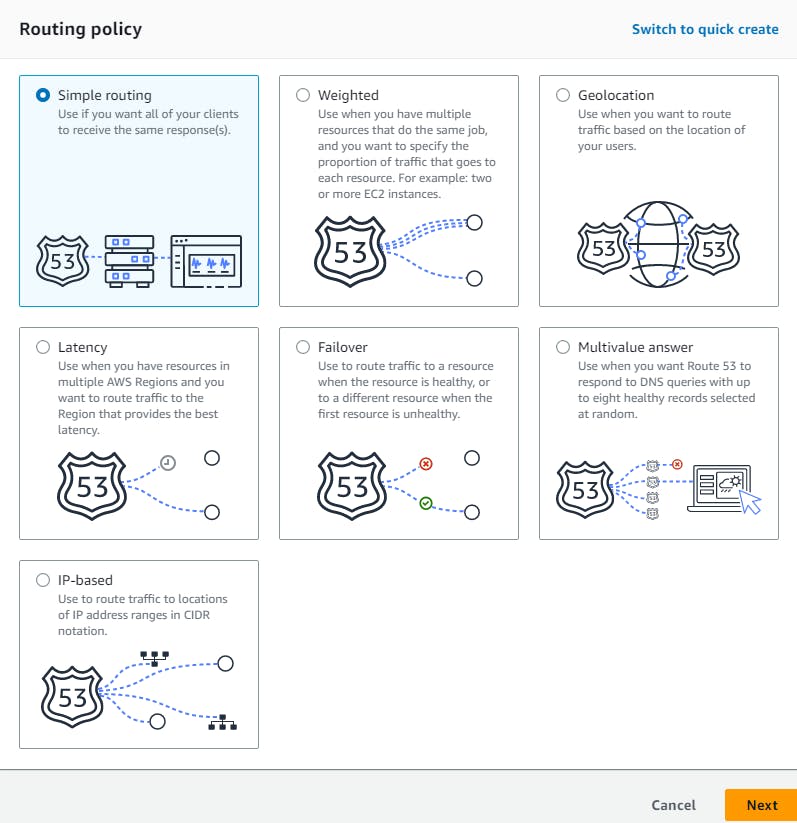
Click "Next" and complete the configuration by pointing your domain name to your CloudFront distribution in the following way:
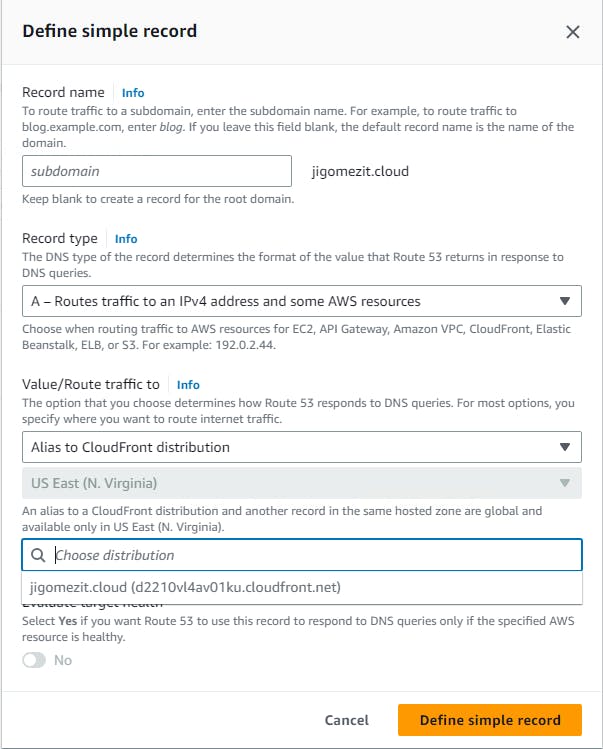
Record name: your domain name. Leave it blank if you're not using a subdomain.
Record Type: A - routes traffic to an IPv4 address and some AWS resources. Use the "A" resource record to point to your CloudFront distribution because the "A" record maps a domain name to an IPv4 address or URL. In this case, the URL is the address of the CloudFront distribution.
Value/Route traffic to: Alias to CloudFront distribution. Look up the URL of your distribution to complete the configuration.
Finally, click "Define simple record" to complete the process of pointing your website to your domain name.
Conclusion
With Route 53 configured, you should have been able to accomplish the following:
Create your bucket and upload your static website
Create your distribution with CloudFront
Create your SSL/TLS certificate for security standards
Route traffic to your domain name to find your website with Route53
Thank you for joining me in this interesting project. I hope it was as helpful for you as it was for me! If you have any questions, feel free to reach out to me through my social media or leave a comment.